
Learn how to batch convert JPG to PNG in Photoshop CC, no matter how many JPGs you have, and get back hours of your life doing this quick and easy export in one seamless swoop.
Batch Convert JPG to PNG in Photoshop

Video Tutorial
Want to see the magic happen before your very eyes? Follow along with my quick and simple tutorial below, and get savvier and smarter with your file exports.
Step-by-Step Tutorial
Import JPGs into Photoshop
Step 1 – Create a new folder and place the jpg files you want to convert in that folder.

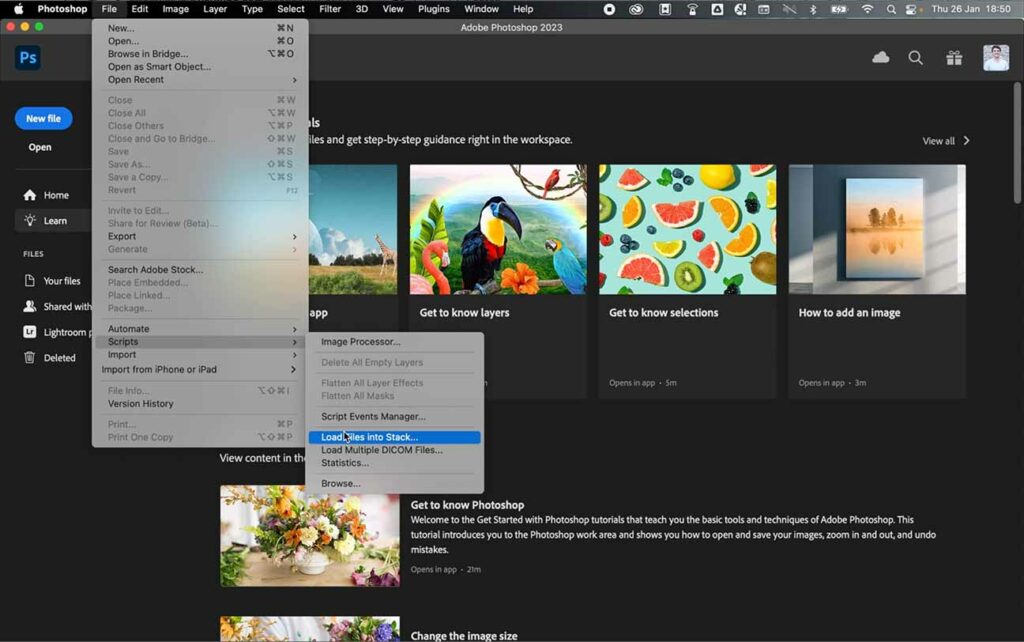
Step 2 – With Photoshop open, go to file > scripts > load files into stack.
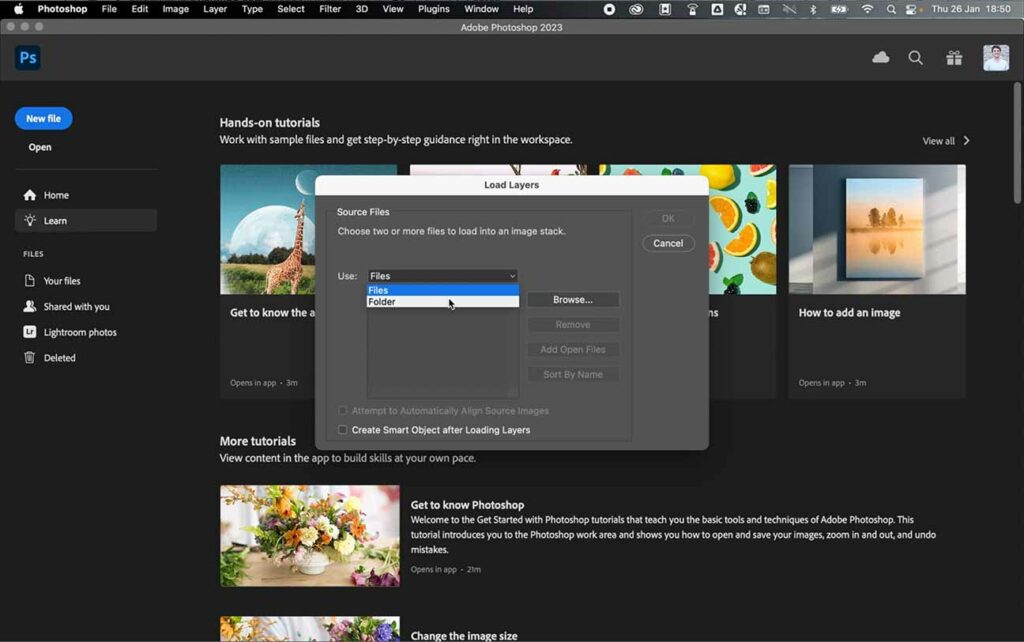
Step 3 – In the load layers menu, select folder. You can select files, but it is faster to load one folder of files, especially if you are working with tens or even hundreds of files.
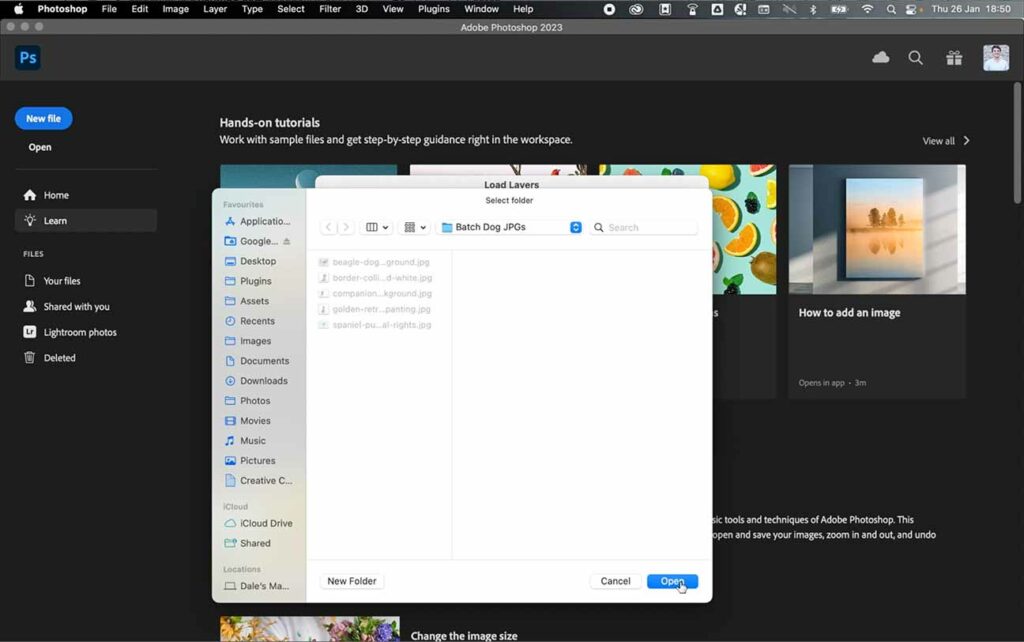
Step 4 – Select browse.

Step 5 – Locate your folder and click open.
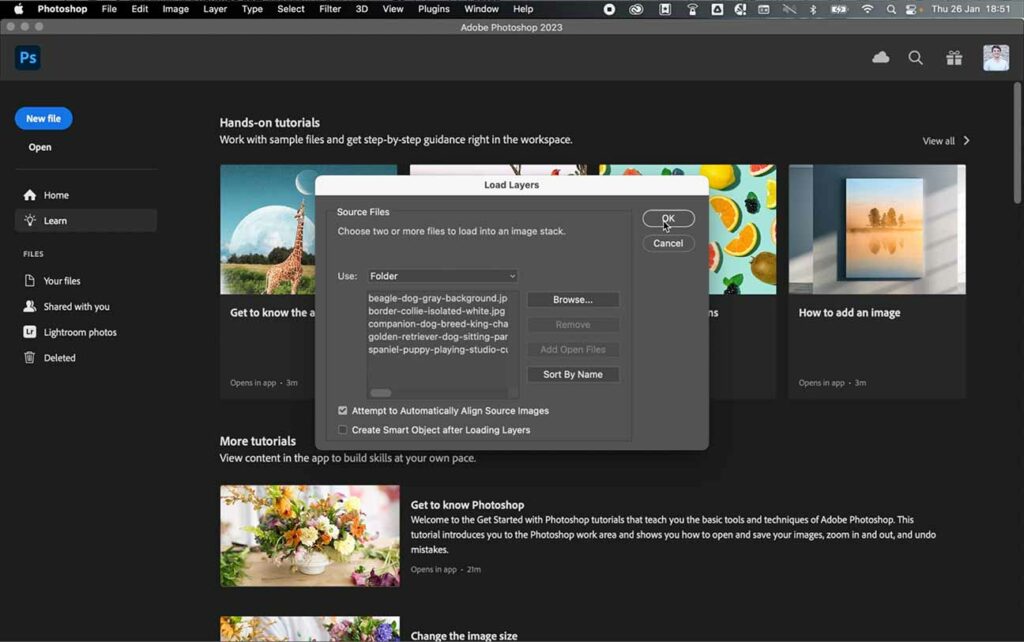
Step 6 – Optionally, attempt to automatically align source images and click ok.
Step 7 – All your jpgs will now be loaded into one Photoshop file as individual layers.
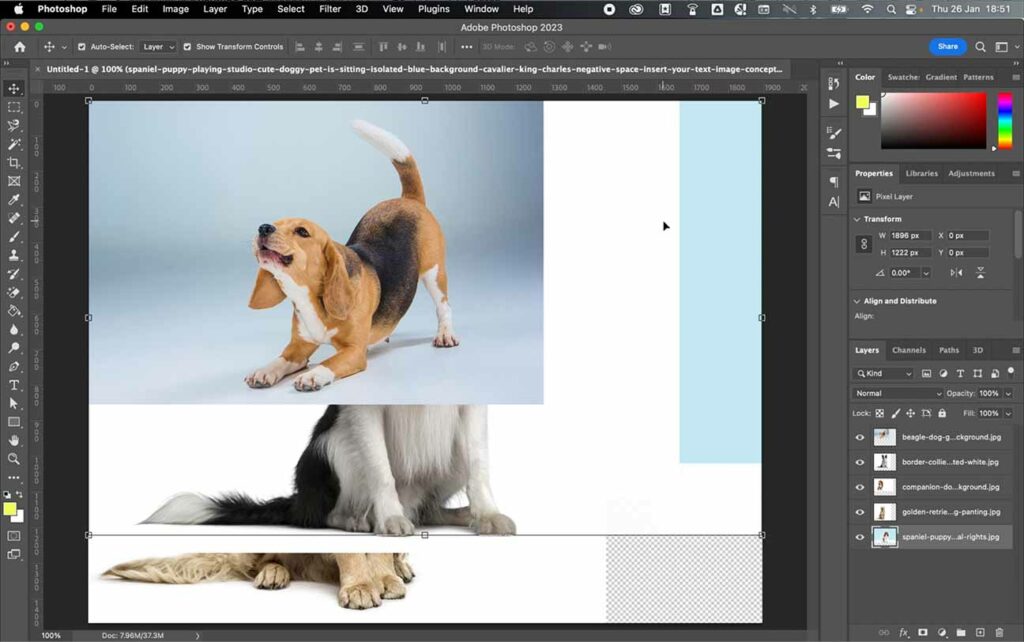
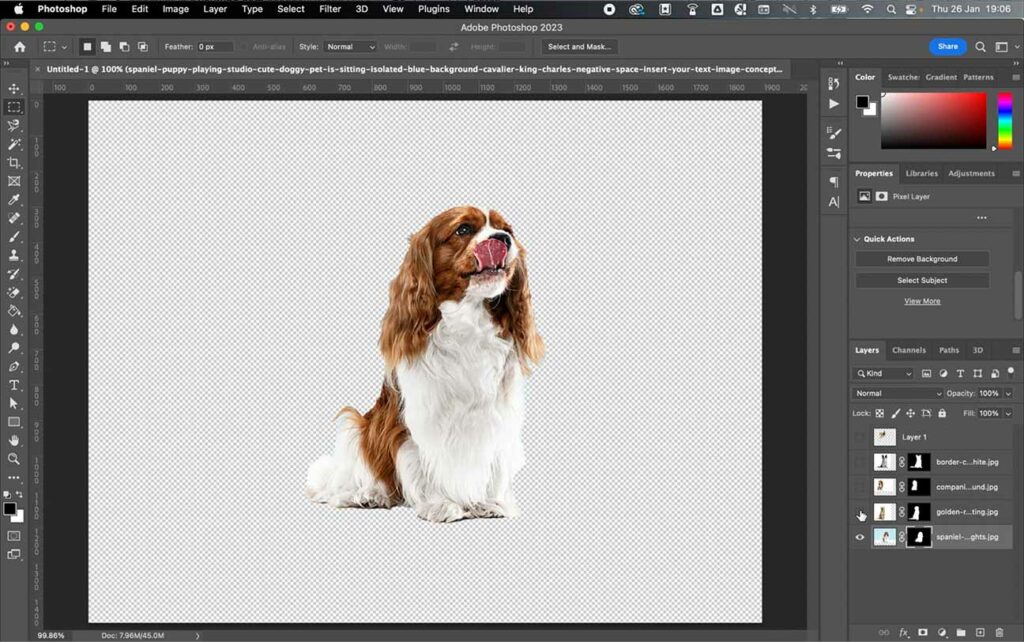
(Optional) Remove Backgrounds
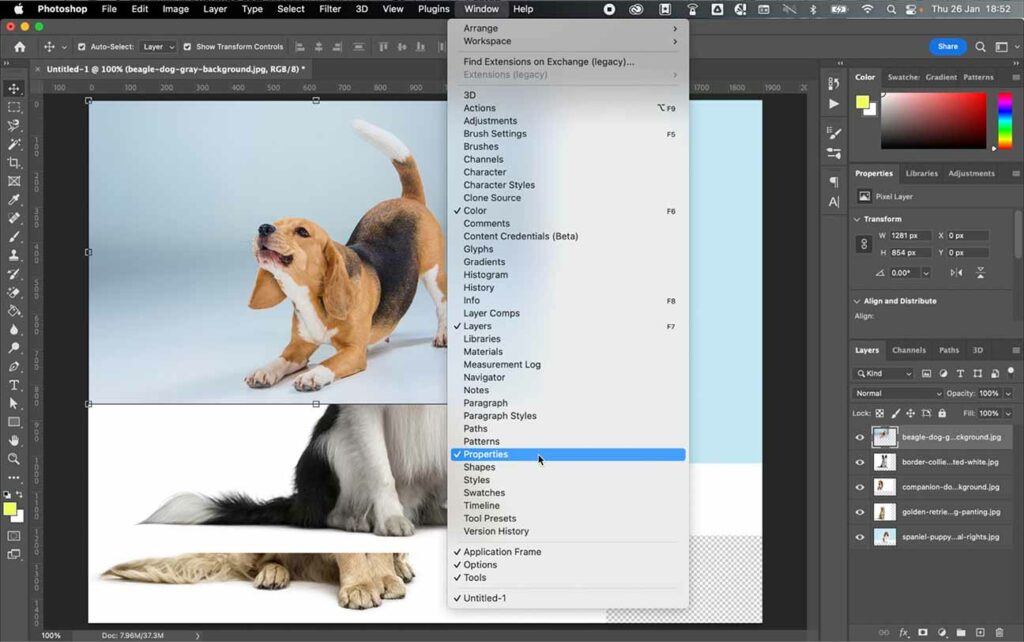
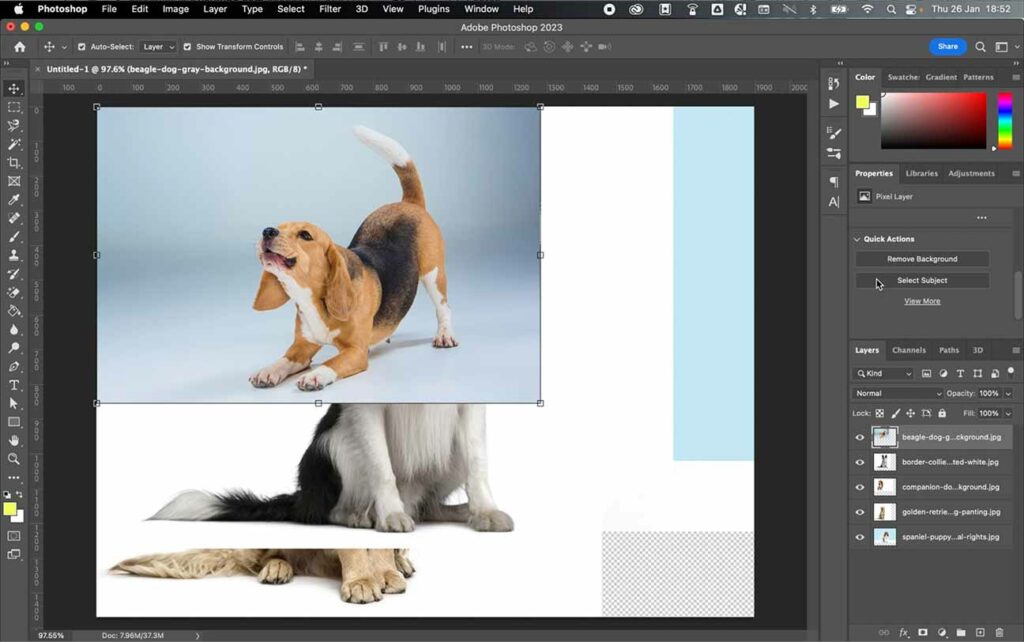
Step 8 – A key feature of PNG files is the ability to export with transparent backgrounds. If this does not apply to you, skip to the ‘convert and export jpgs to pngs’ section. If you do want to create transparent backgrounds, select the first layer and go to window > properties.
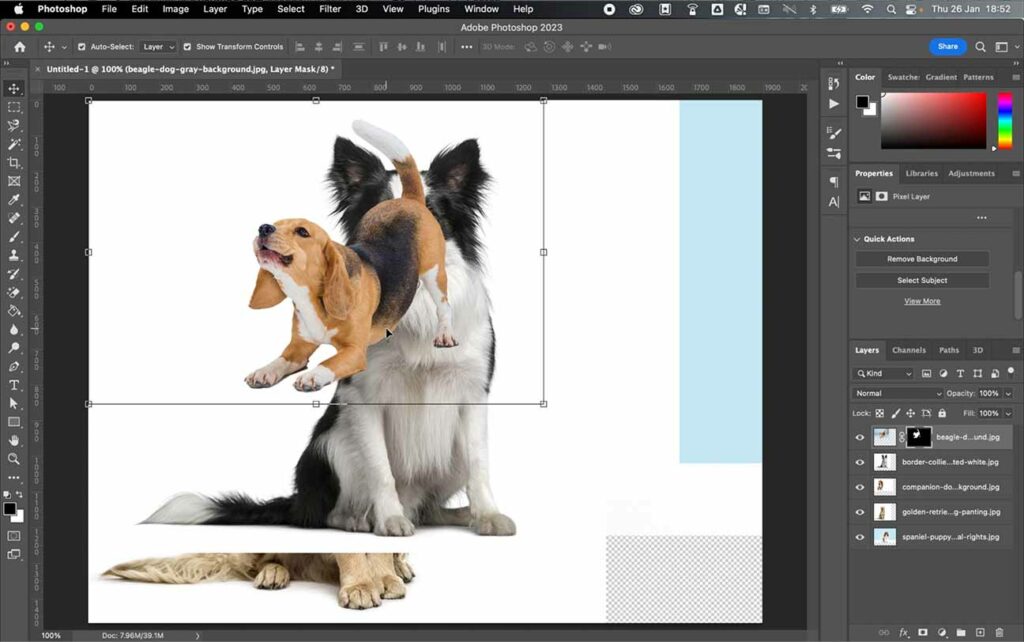
Step 9 – In the layer properties panel, there are two ways to do this. The first is to scroll to quick actions and select remove background.

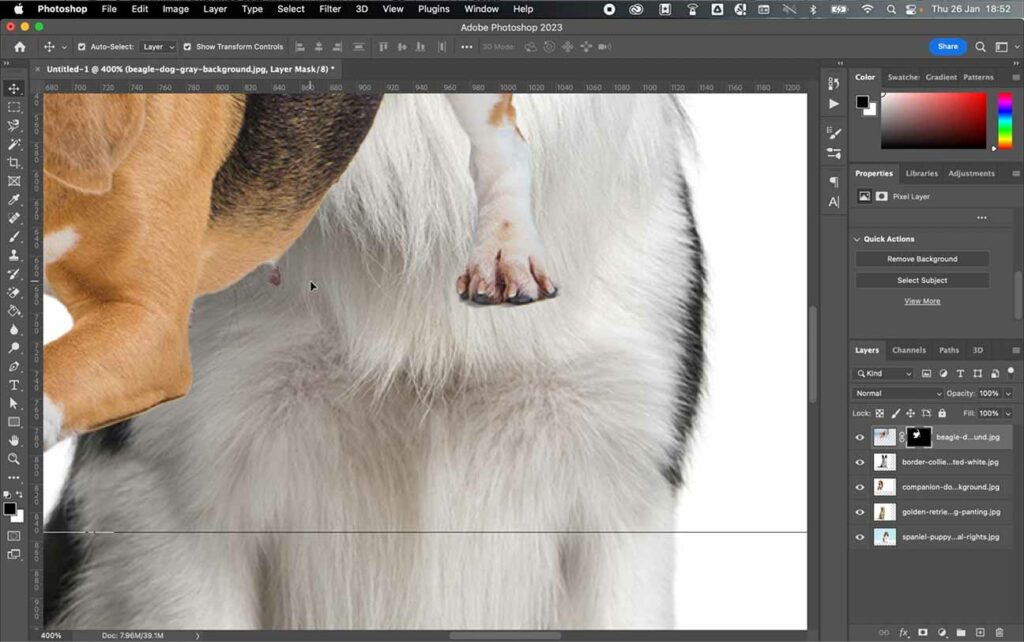
Step 10 – This will remove the background and create a layer mask. However, this method, if you don’t have a high contrast between the background and subject, doesn’t always yield flawless results.
Step 11 – If your edges need refining, like below, instead first cmd/ctrl + z to undo the applied remove background.
Step 12 – Now, click select subject instead.
Step 13 – With the subject selected, use cmd/ctrl +/- to zoom in and out to better see the select, and use the hand tool to move around. To refine the selection, select the magic wand selection tool from the left-hand toolbar.
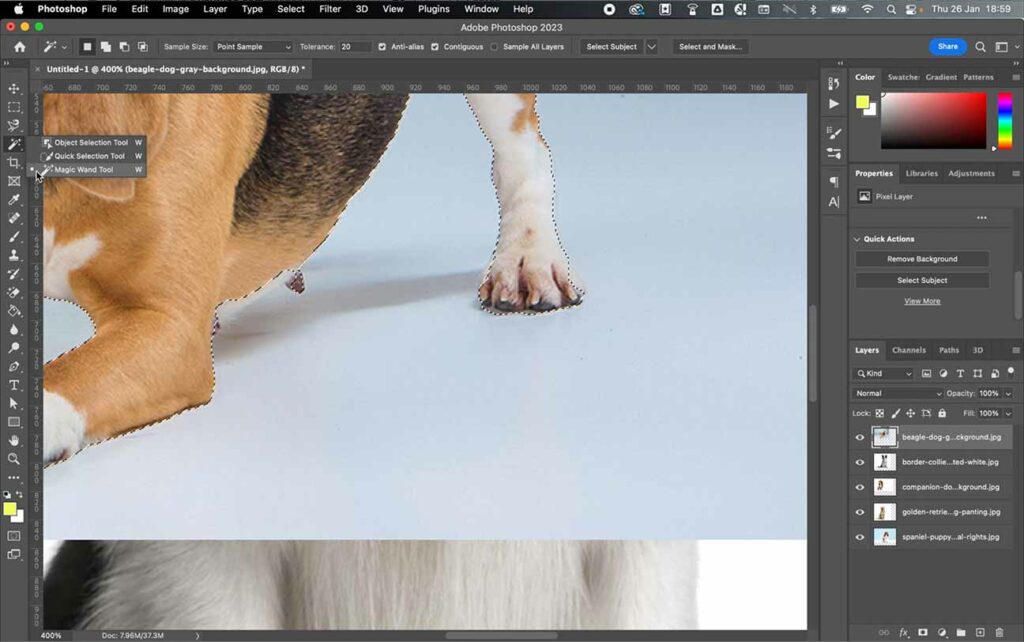
Step 14 – Change your tolerance to a higher or lower number, depending on how detailed the image is. A higher tolerance means the wand will pick up a higher number of pixels in one click.

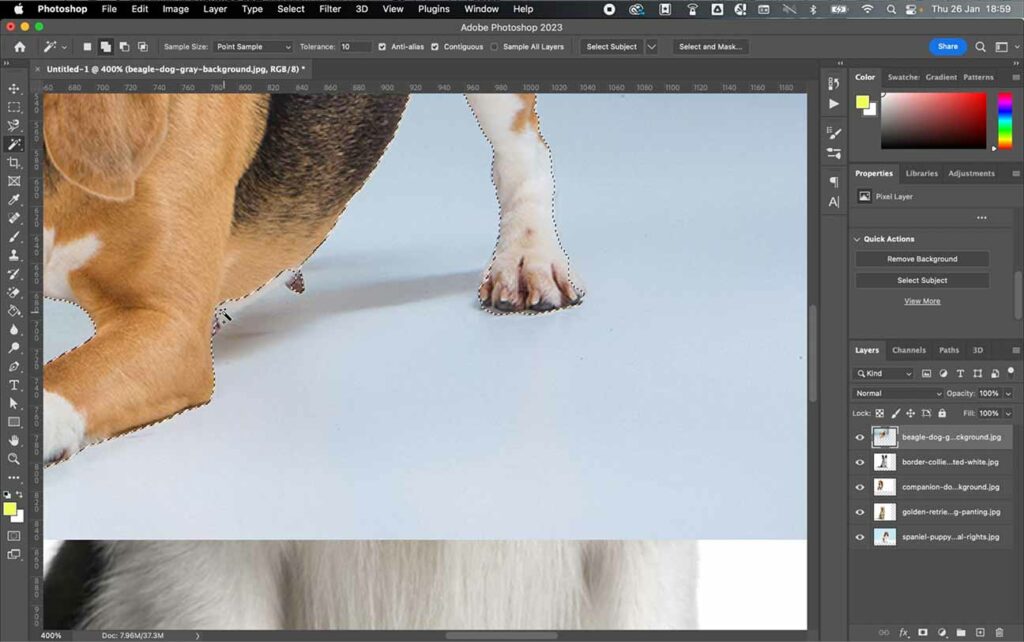
Step 15 – Hold alt/option and click and drag the cursor to remove from the selection.

Step 16 – Hold shift and click and drag the cursor to add to the selection.
Step 17 – Once you are happy with the selection, click the marquee tool, right-click the selection, and either select and mask to stay on the current layer or layer via copy to create a new layer with the selection.
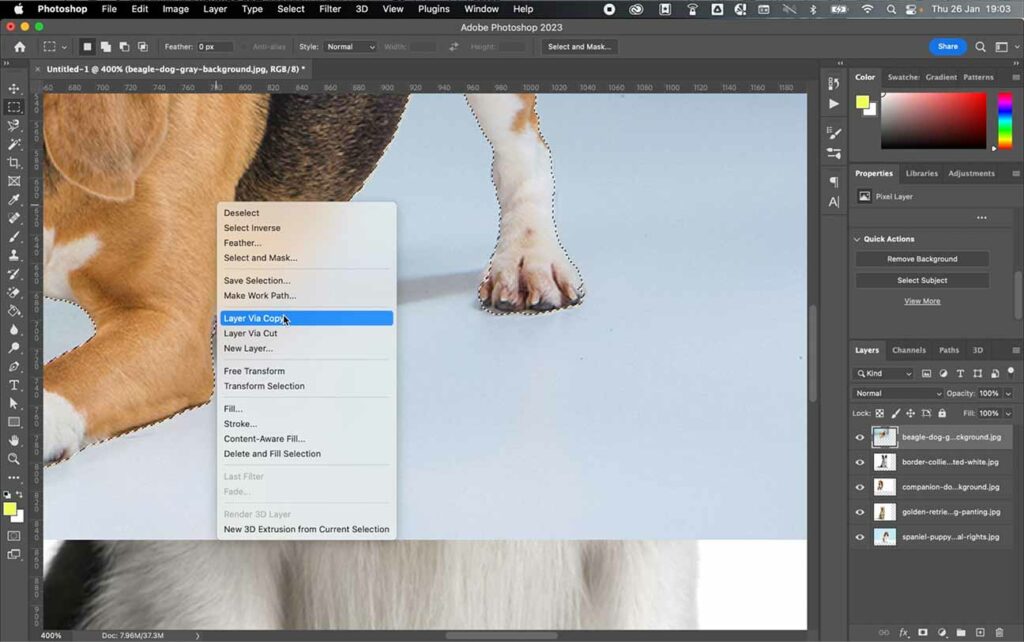
If you layer by copy, be sure to remove the original layer. Select it and use the delete option at the bottom of the layers panel; otherwise, this layer will be included in your batch export.

Step 18 – Repeat the remove background techniques on all the jpg layers.

Step 19 – Toggle visibility on and off each layer just to double-check check you are happy with the selection of the subject.
Convert and Export All JPGs to PNGs
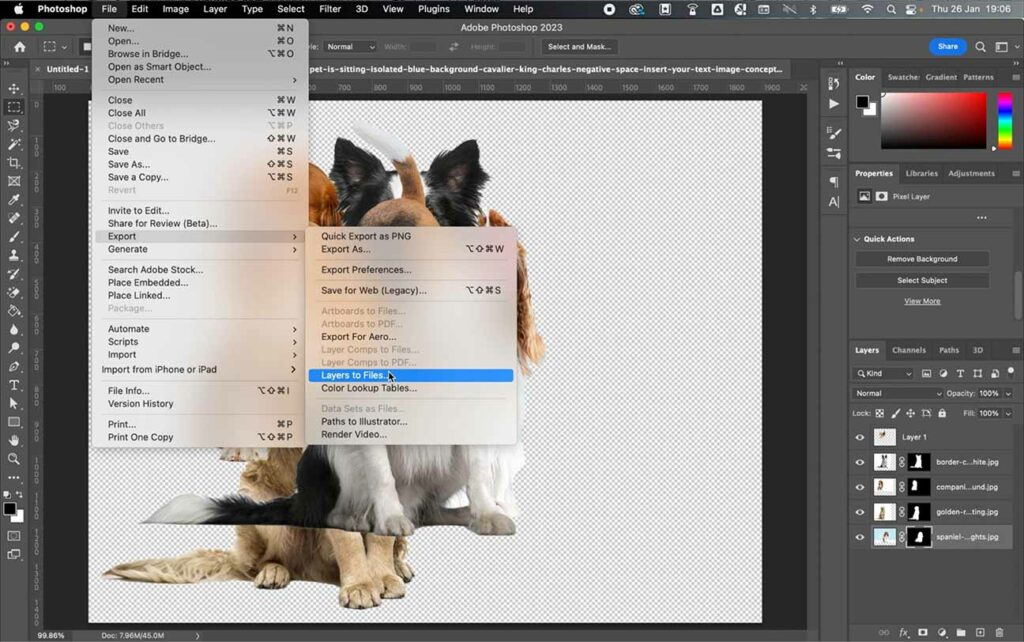
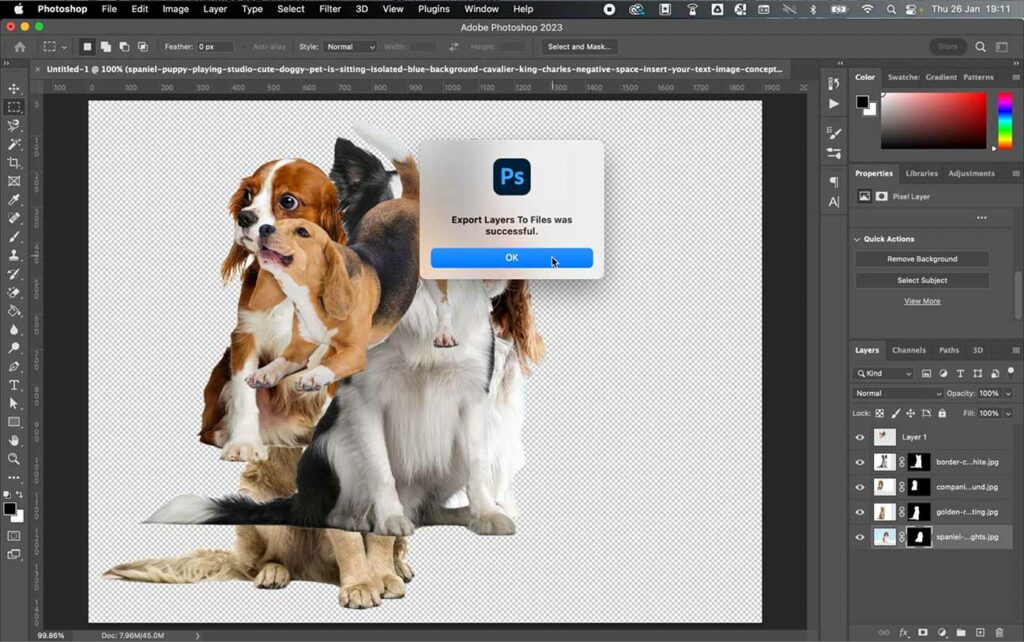
Step 20 – Turn the visibility of all layers back on, and then go to file > export > layers to files.
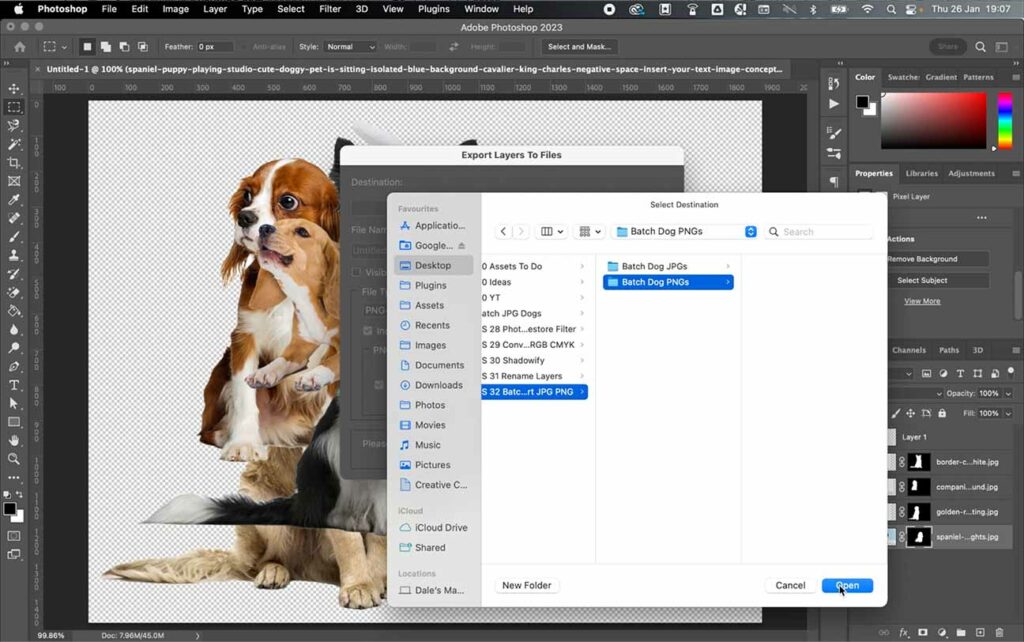
Step 21 – In the export layers to files menu, choose a save destination by clicking browse.
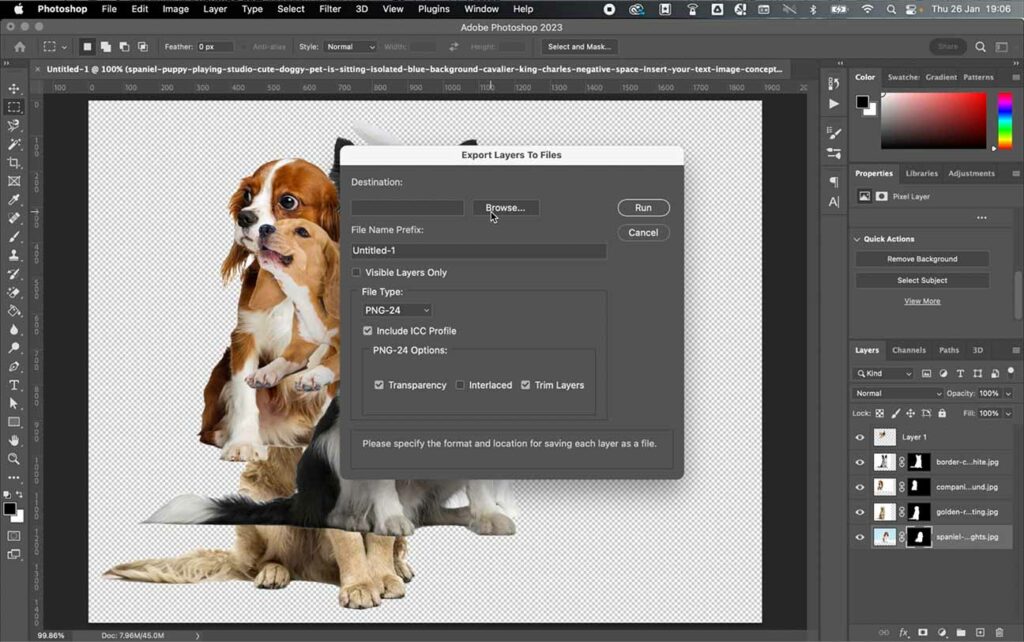
Step 22 – Choose a destination folder. As you can see, I created a specific PNG folder to save them in the same place as the JPG folder so that both original and new files can be found in the same place. Once selected, click open.
Step 23 – Set your preferences.

Export Layers to Files Options
Layers in Photoshop – Be sure to rename all your layers if you want them to have a specific name. The way export layers works is that it will create a unique name for each layer, which is prefix + number of numerical order + layer name. If you are not precious about the file name, you can just let the export do its thing, but if you are, you may need to go in and manually change the file name.
File Name Prefix – The export will add this to the start of the name of every file, followed then by its chronological number and layer name, as mentioned above. If you leave this blank, it will add untitled, so try to add a prefix to make things tidier.
Visible Layers Only – Check this if you only want to export layers you have toggled on with the visibility option. Uncheck if you want all layers in the file exported.
File Type – You have many options here, but for this exercise, you can choose either PNG-8 or PNG-24. PNG-24 works with a broader color palette, but the file size will be slightly higher, so choose according to your artwork. I chose PNG-24 because I am working with photographs.
ICC Profile – Check this if you want to try to match your export colors as closely as possible to the original files.
Transparency – Check this to include the transparent background in each PNG. If left unchecked, the background will auto-fill (by default to white).
Interlaced – Leave this unchecked, as you are working with such a small file size, you don’t need to worry about loading times for a PNG. Plus, this will increase fill size.
Trim Layers – Check this, as the export will trim either to the edges of the image if you have a background, or the edges of the subject if you want a transparent background. If you want to export to a set background size, make sure your subjects are all centrally aligned and leave this unchecked.
Once ready, press run.
Step 24 – The batch export will run, and once finished, simply click ok.
Step 25 – Finally, locate your save folder and check for your PNG files. As you can see below, all my dogs exported from JPGs to transparent trimmed PNGs.

Hopefully, this tutorial will help save you hours of time exporting tens, even hundreds, of JPGs as PNGs, all with a few smart tricks and simple options.
When exporting, speed is a big part of the game. With this trick, you don’t have to go through individual layers or files and save each one as a PNG. Trust me, it is a real lifesaver when you know these techniques!
Featured Images: Licensed by Freepik