
Use this super cool technique to remove sky from an image in Photoshop CC and save yourself plenty of time and painstaking editing with the selection and lasso tools.
Once the sky is removed, the world really is your oyster. From epic galactic backdrops to gorgeous sunsets, transport your landscapes and subjects to some epic places once the blue sky has been removed.
Video Tutorial
Watch me demonstrate this super quick technique in the video above, and see for yourself how much time this little trick could save you.
Step-by-Step Tutorial
Remove Sky with Layer Style Blend
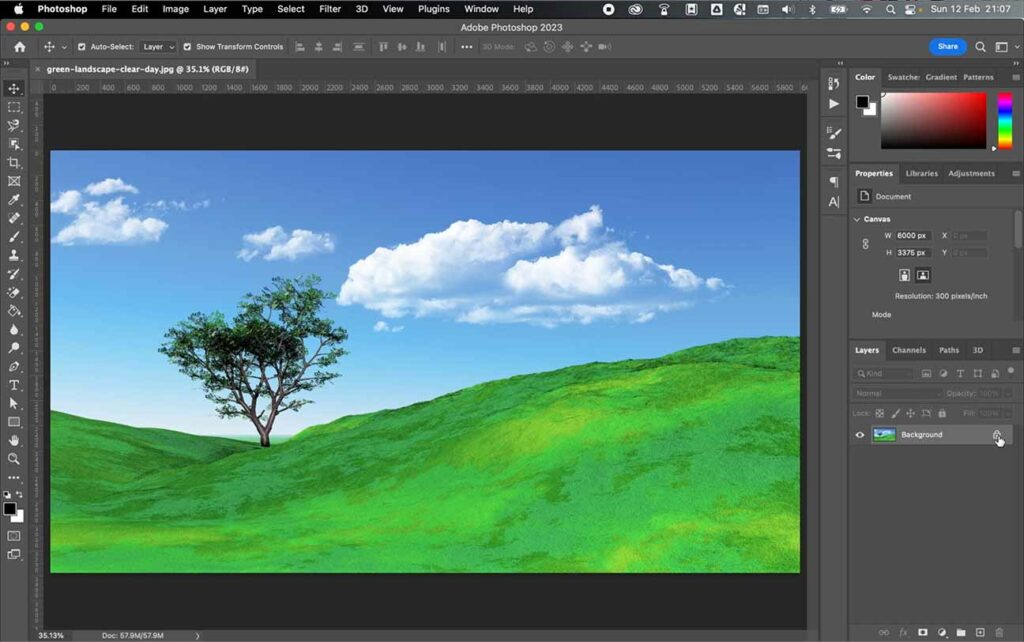
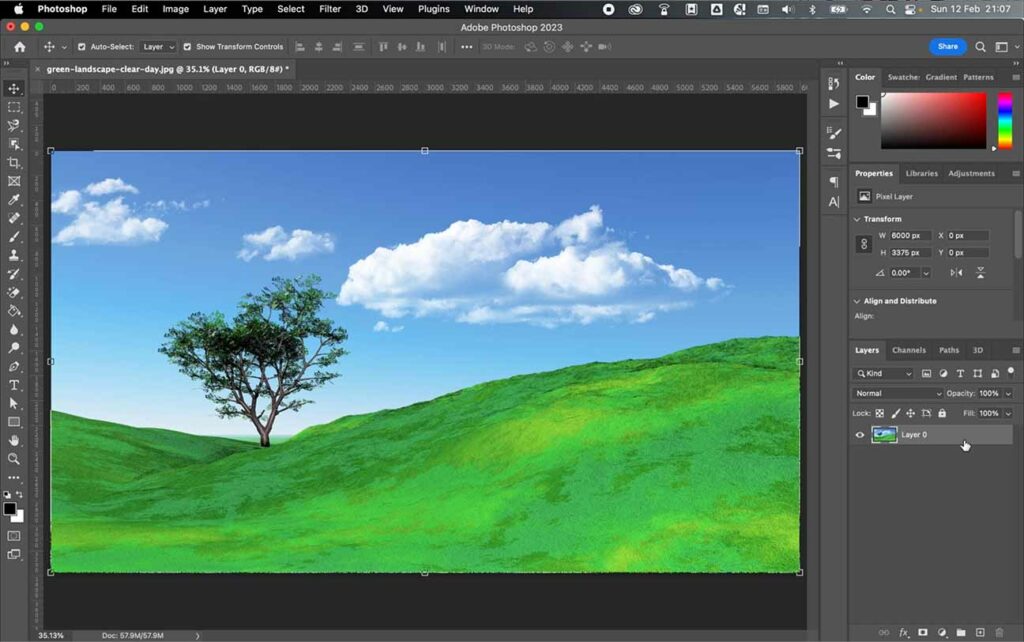
Step 1 – Open your image in Photoshop and unlock the background layer by clicking the lock icon.
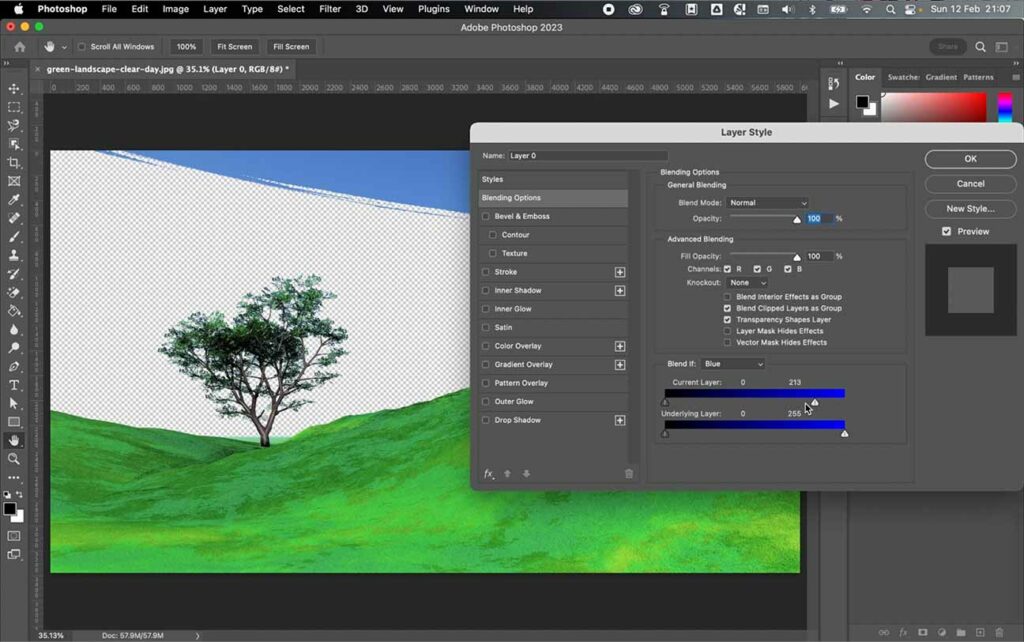
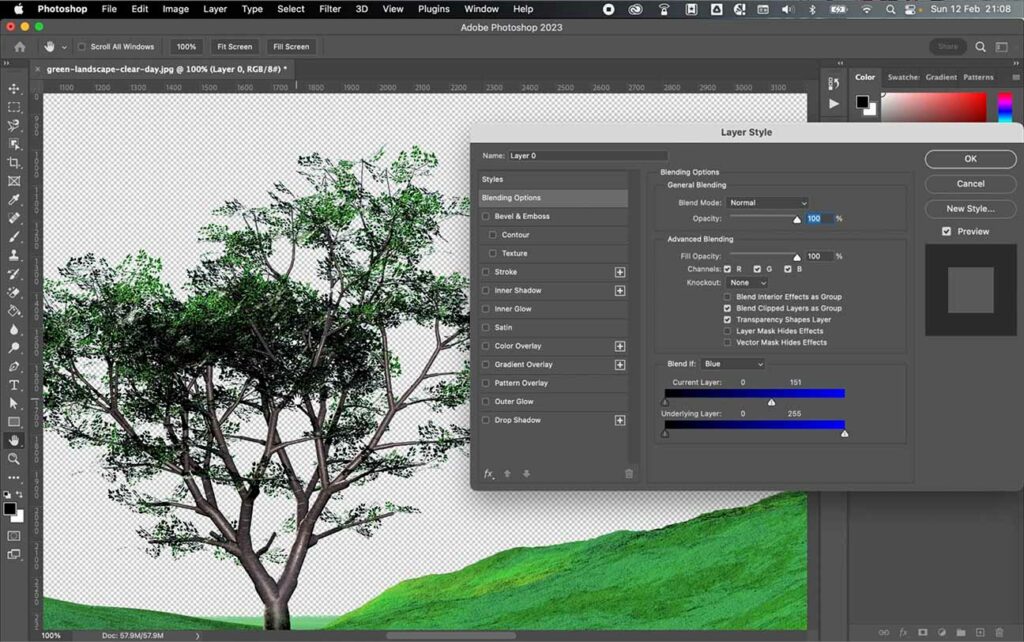
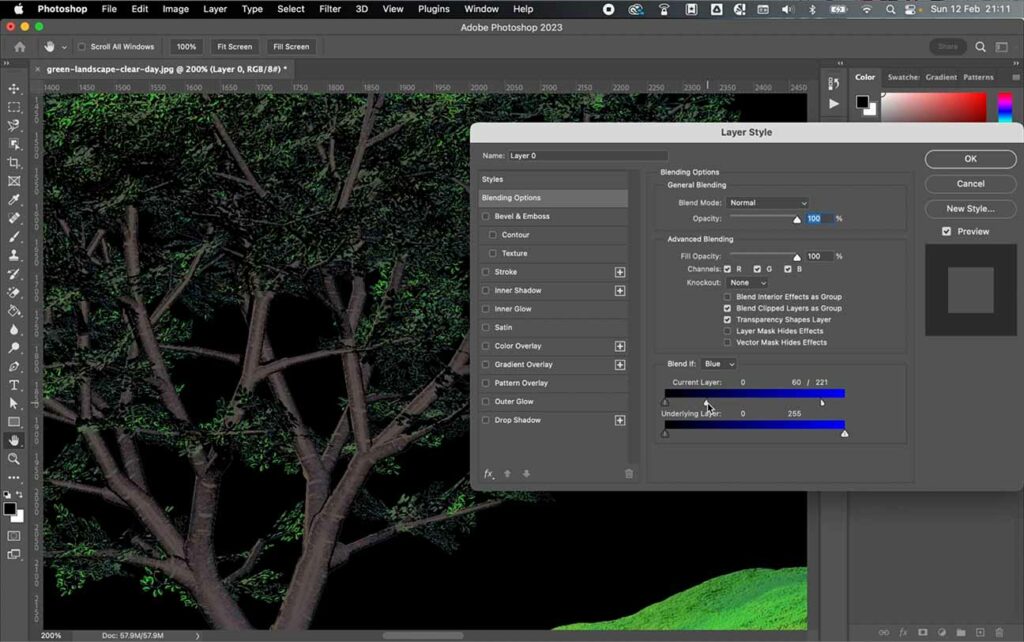
Step 2 – Double-click to the right of the newly formed layer to bring up the layer style menu.
Step 3 – At the bottom of the ‘blending options’ menu, beneath ‘blend if,’ set ‘blue’ from the dropdown menu.

Step 4 – On the ‘current layer’ scale, slide the cursor left or right to add or remove the blue hues from the image, which will add to or remove from the sky.
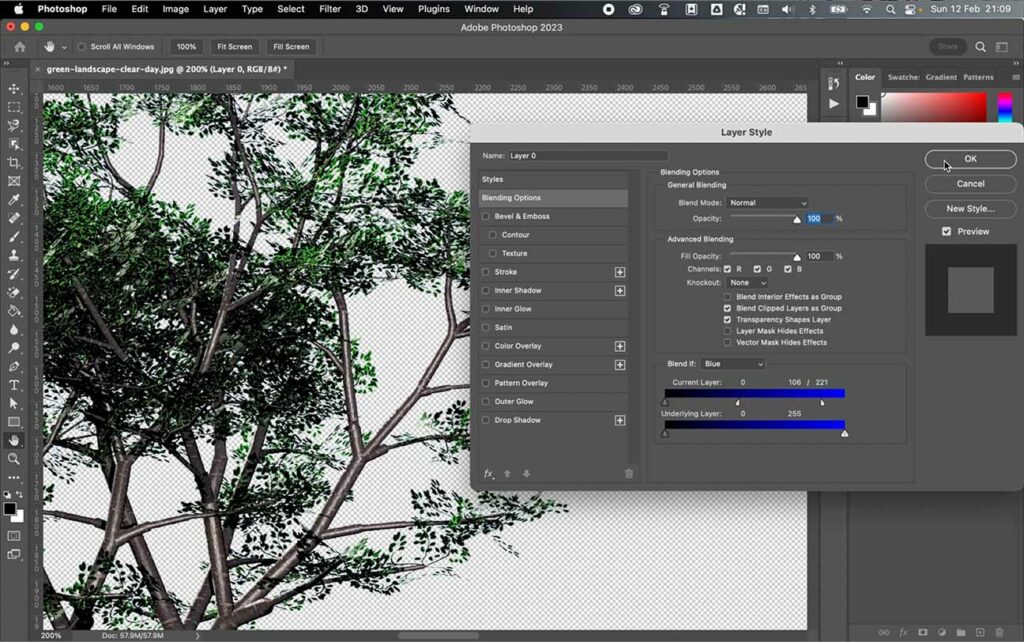
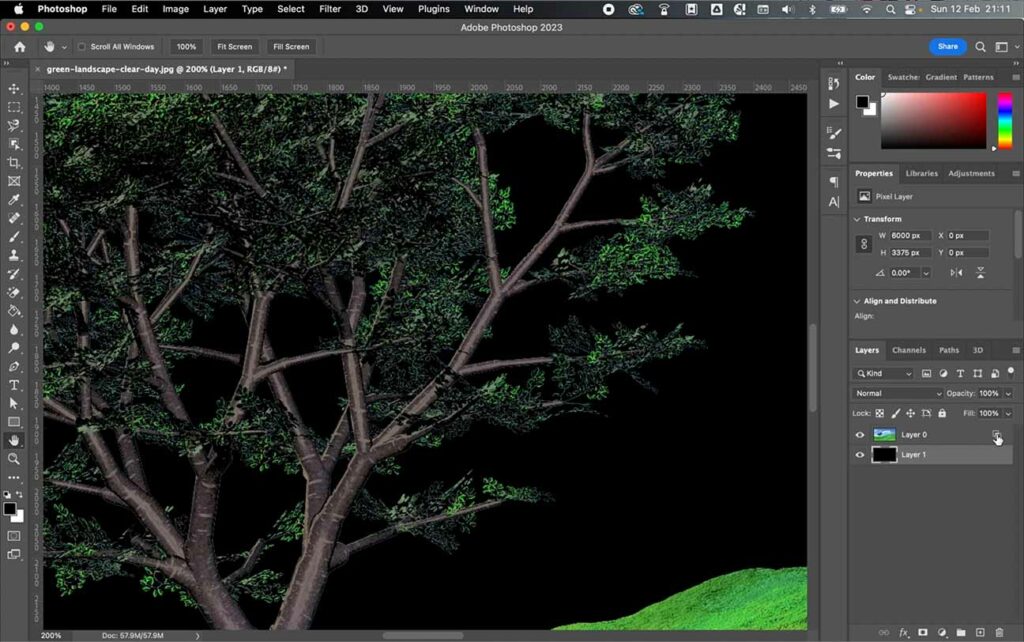
Step 5 – Use cmd/ctrl with the + or – keys to zoom in or out of the image to better see different areas or more complex parts of the image.
Step 6 – Use the hand tool in the left-hand toolbar and click and drag to scroll across the screen to get to certain areas of the image to check your blend.
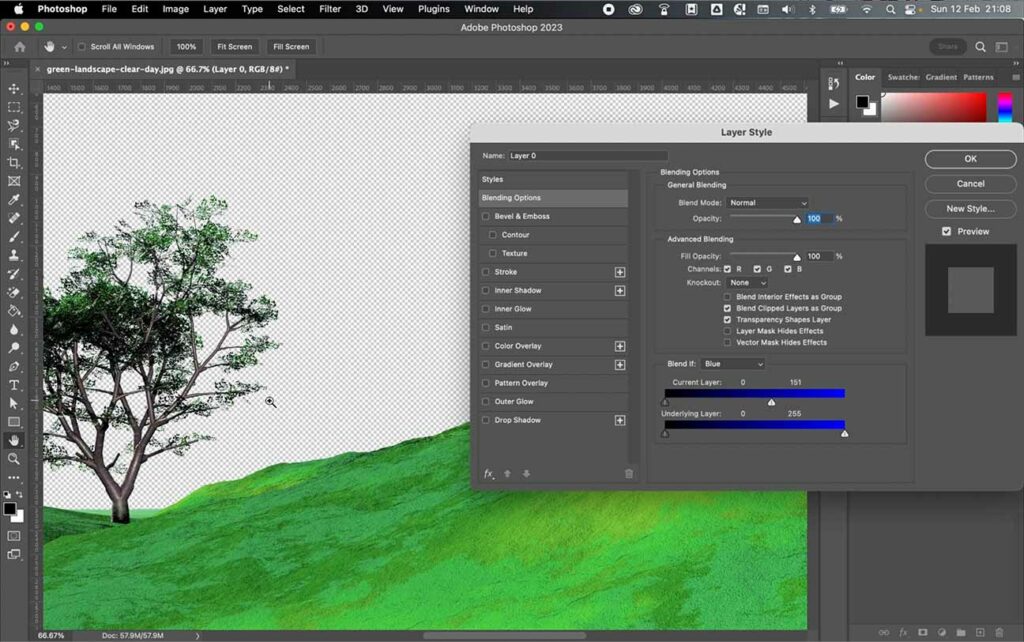
Step 7 – Place your cursor over the slider of the ‘current layer’ scale, hold the alt or option key, and then click to separate the cursor into two. From there, you can adjust the removal of the blue hues with far more control.

Step 8 – Adjust both cursors until the blend is less harsh and more seamless.

Step 9 – Once you are happy, click ok.
Add Background Layer
Step 10 – Click the ‘new layer’ icon in the layer panel to add a new layer.
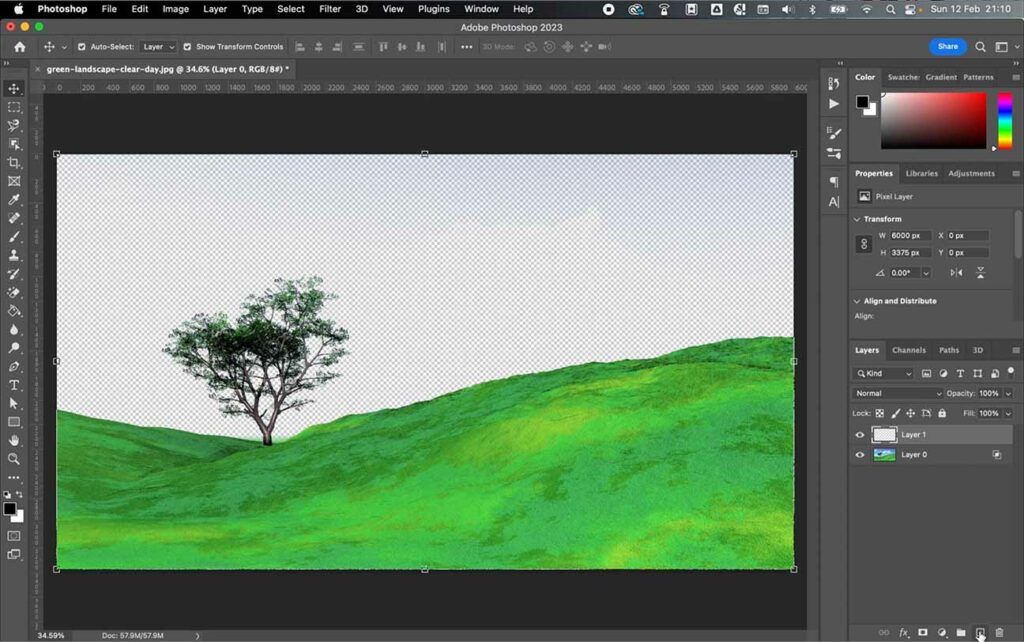
Step 11 – Click and drag the new layer underneath the original layer.
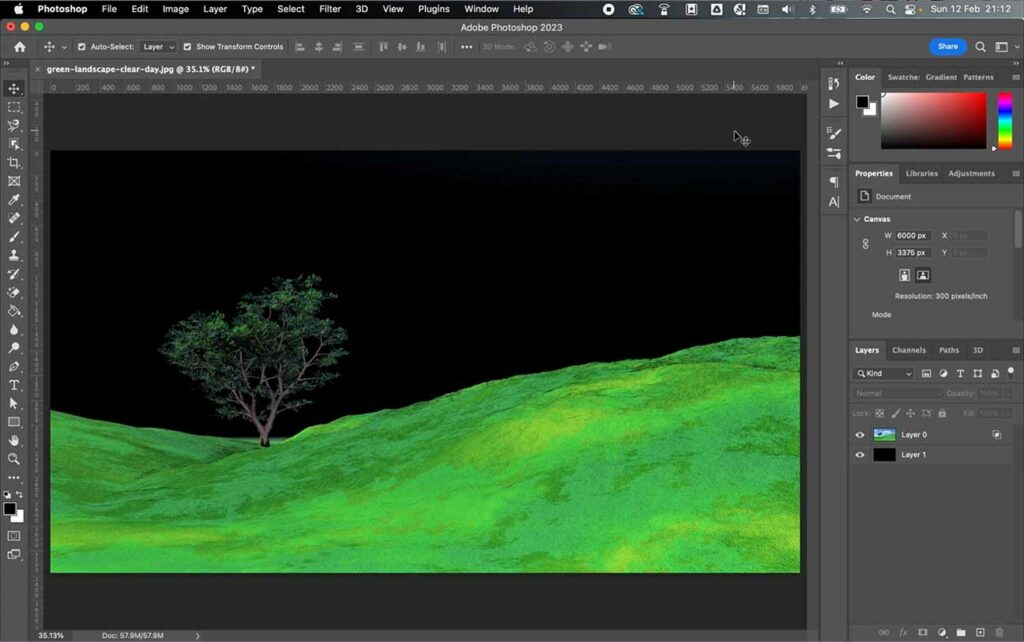
Step 12 – For the purpose of showing the selection against a contrasting background, I will use a simple fill color. Select the ‘paint bucket tool’ from the left-hand toolbar.
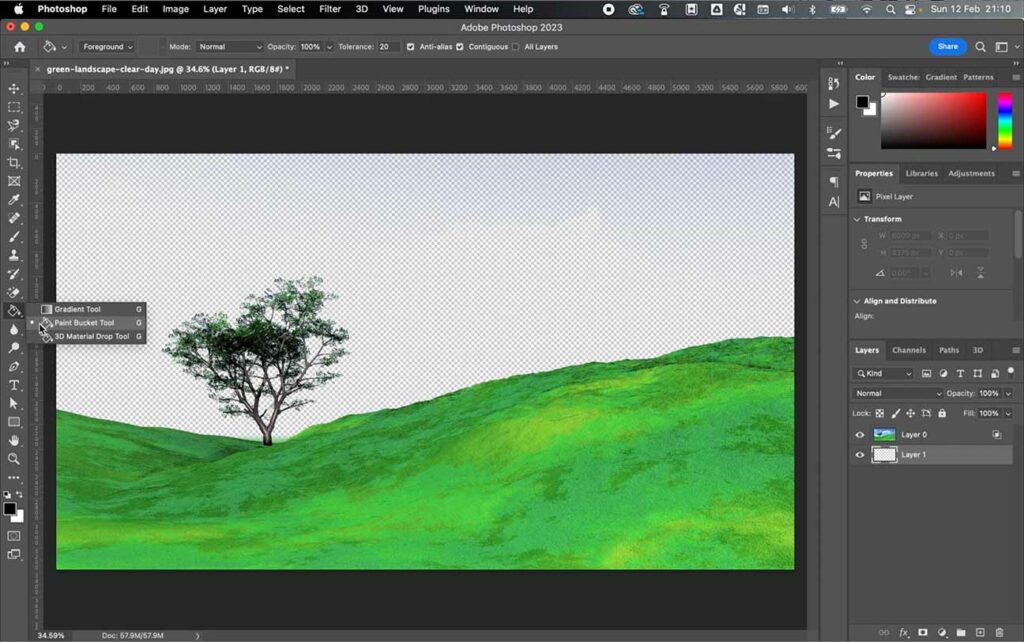
Step 13 – Set a foreground color (bottom left, black and white squares) and click to add the color. I will use this layer to see how good my selection is and if there are any white or jagged edges.
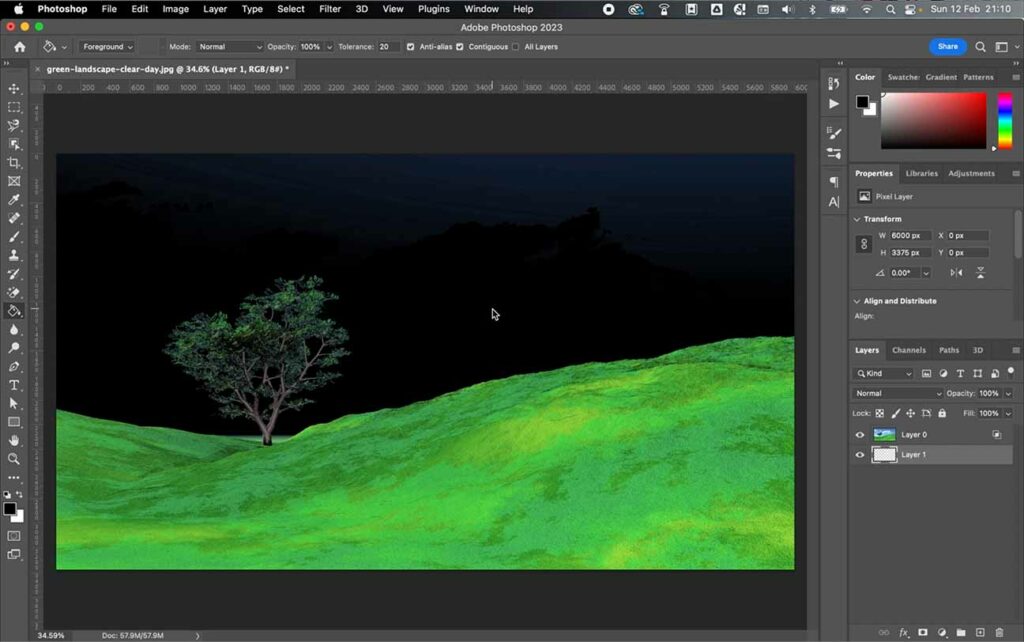
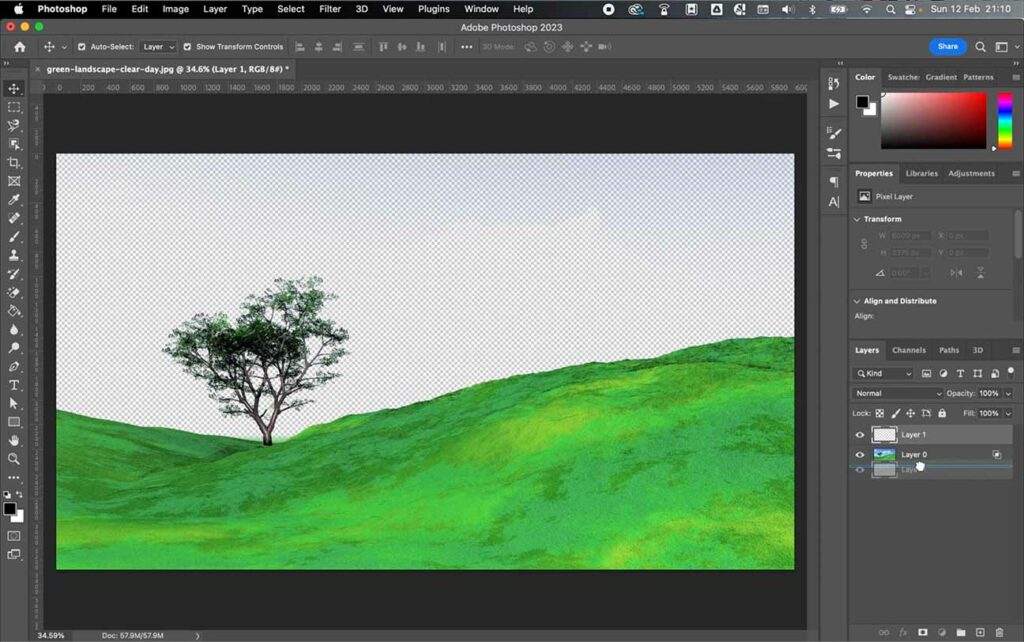
Step 14 – Click the overlapping squares icon on the layer to go back into the layer style menu.
Step 15 – Revisit the two sliders on the ‘current layer’ scale, and continue to slide until you are happy that all the sky has been removed. Finally, click ok.
Step 16 – Go forth and either replace the sky or have fun with some epic backdrops in your Photoshop document!
If you have complex and difficult shapes to select and cut in your image, such as a tree, as in the example, this trick can save you so much time and a world of pain!
Through the use of the blue channel, you can pretty much erase all of a blue sky while keeping a smooth, seamless edge around all of your subjects and objects, no matter how complex they may be.
Featured Image: Licensed by Freepik